
DISCLAIMER: The content of this post/blog is based on opinion on what I have learned and for educational purposes, therefore if there are any mistakes or recommendation for improvement leave a comment 🙂
History:
Kali Linux is a Debian based linux distro that is made for the purposes of penetration testing, version 1.0 was released on March 12, 2013. Previously it was known as Backtrack. It is used by many Penetration testers because it provides most tools needed for Penetration testing which makes it the perfect OS for hackers. The tools have been categorized so that the user can identify each tool easily and its purpose.
The categories are:
- Information Gathering
- Vulnerability Analysis
- Wireless Attacks
- Web Applications
- Exploitation Tools
- Stress Testing
- Forensic Tools
- Sniffing and Spoofing
- Password Attacks
- Maintaining Access
- Reverse Engineering
- Reporting Tools
- Hardware Hacking
Installing Kali Linux in Virtual Box for Windows 10:
Before Installing, I would like to personally recommend to have a Computer/Laptop with:
- 8 GB RAM
- Minimum 100 GB Storage Available
- A Processor at least 2.5 GHz
In this post I will talk about how to install Kali Linux in Oracle Virtual Box for Windows 10.
Websites:
- https://www.virtualbox.org/wiki/Downloads
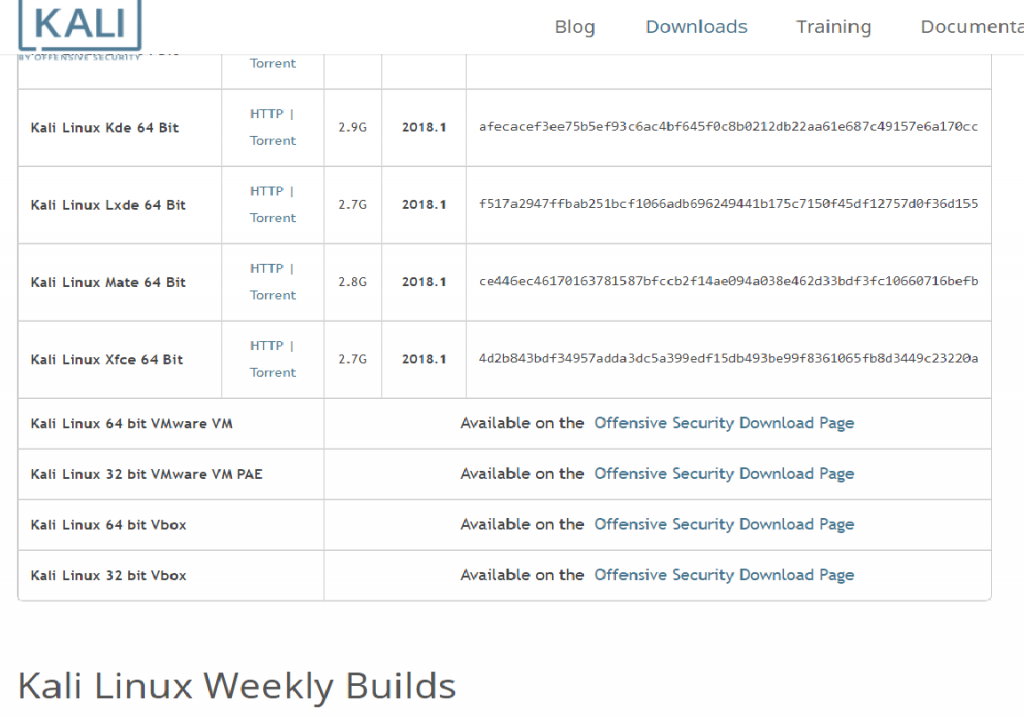
- https://www.kali.org/downloads/
First of all go to the virtual box website and download the virtual box for the windows host and the Oracle VM VirtualBox Extension Pack.

Install the virtual box for the windows then install the Virtual Box Extension Pack which can all be done easily.
NOTE: During the installation if it displays a warning/pop up to Install Oracle Corporation Universal Serial Bus/Network Interfaces click Yes.
Go to the kali linux website download’s page and download the Kali linux Vbox based on your Computer/Laptop’s architecture.
Double click the downloaded file and you should have a ready Kali Linux Virtual Machine in your Virtual Box.
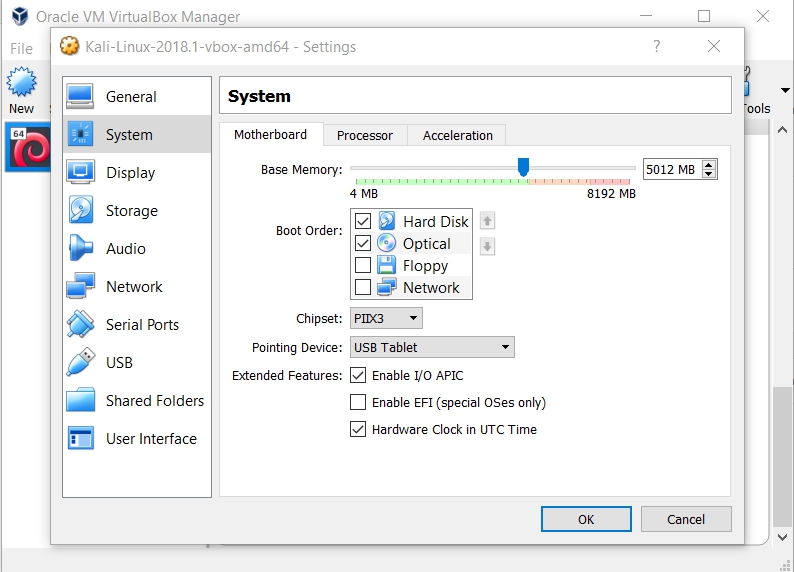
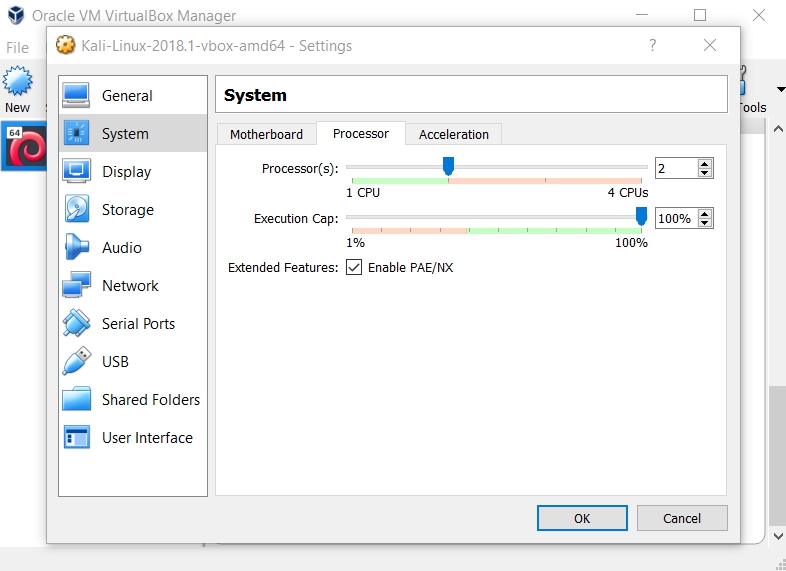
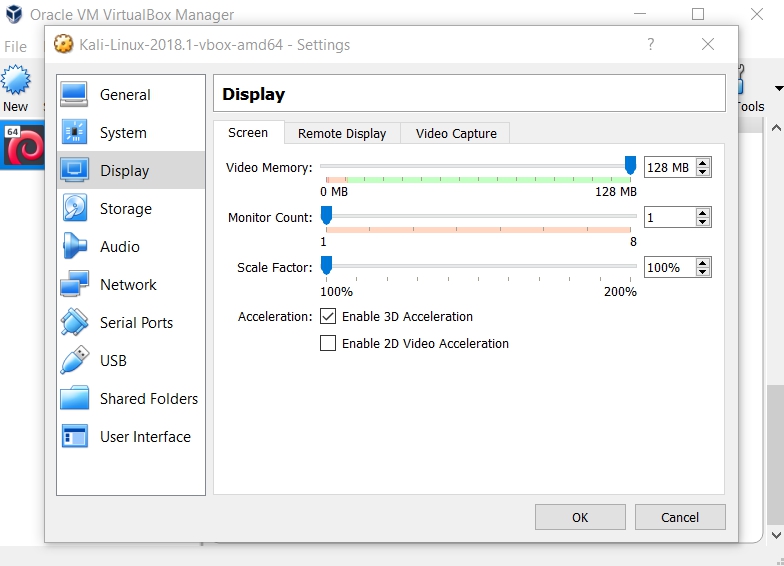
Before starting, you should change the setting of your Kali Linux Virtual Machine if you would like the best performance for your Virtual Machine using your computer/laptop. You can do so by changing the Base Memory and number Processor(s) in System plus its Video Memory in Display.
After doing all of those you are done and you are ready to start Kali Linux.
If you would like to use Kali Linux by using USB Boot or Dual Boot, you can do so by using rufus which I probably would make the tutorial in a different post 😉
https://rufus.akeo.ie/
Simple Configuration/Getting Started:
Start Kali Linux and you will be prompt to a Login Screen. The default login credentials are as follows:
- Username: root
- Password: toor

NOTE: During the virtual machine initialization you might see some FAILED messages, ignore that.
NOTE: You can change the password by running passwd command in terminal.
Then hooray, you are finally using Kali Linux, it is recommended that you know some Linux Basic Commands which I will teach in a different Tutorial/Post.
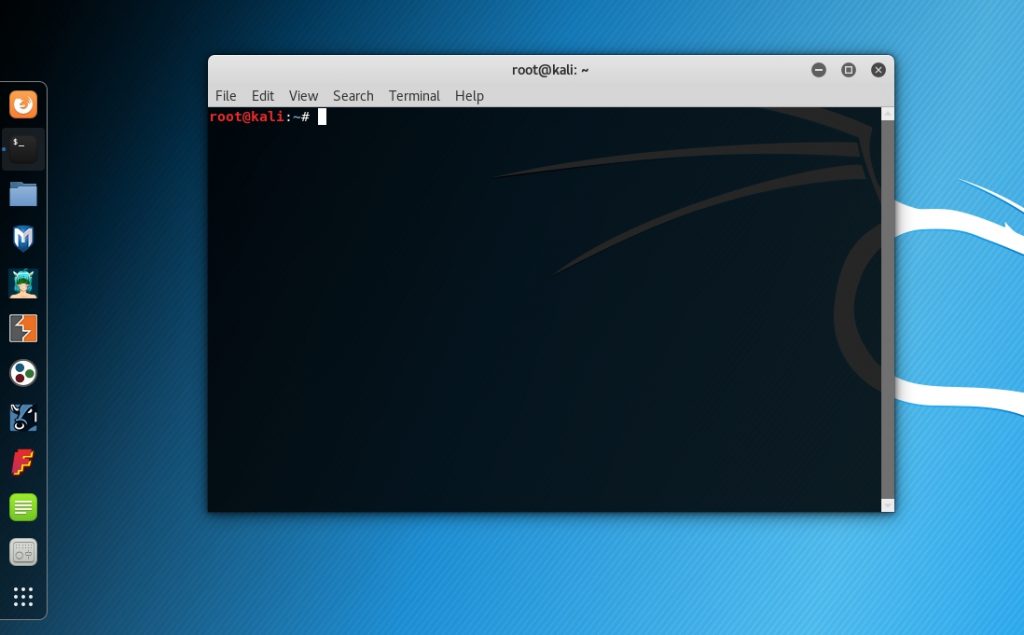
Okay let’s start by Opening Terminal which is the second icon from the Top in the menu on the left.

After clicking the Icon you will have an open window as below.
NOTE: sudo is a command used to run programs with security privileges by supplying the superuser or admin’s password.
We will be learning three commands:
- sudo apt-get update: This will synchronize/update the package’s list from repositories to get information on the newest version of packages and their dependencies to perform upgrading.
- sudo apt-get upgrade: This will upgrade all packages on the machine based on the package’s list information received from running the command above.
- sudo apt-get dist-upgrade: This will upgrade the entire Kali linux.
It is recommended to run apt-get update before running any of the upgrade commands.
FAQ: What is the difference between apt and apt-get?
- apt is more supported for end users as its output is still understandable to end users while apt-get outputs a more lower level/back-end message which is more less human readable. It is recommended for users who intend to use back-end operations to use apt-get.